
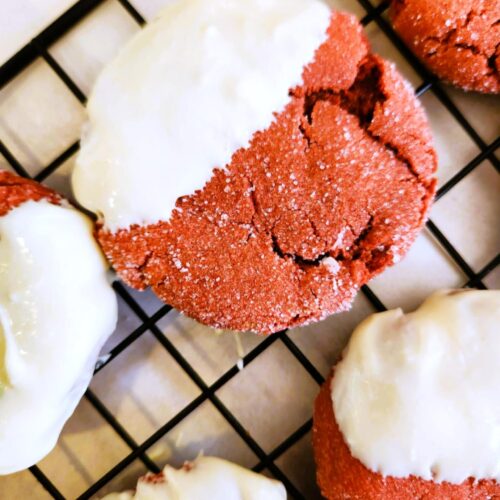
White Chocolate Dipped Red Velvet Cookies
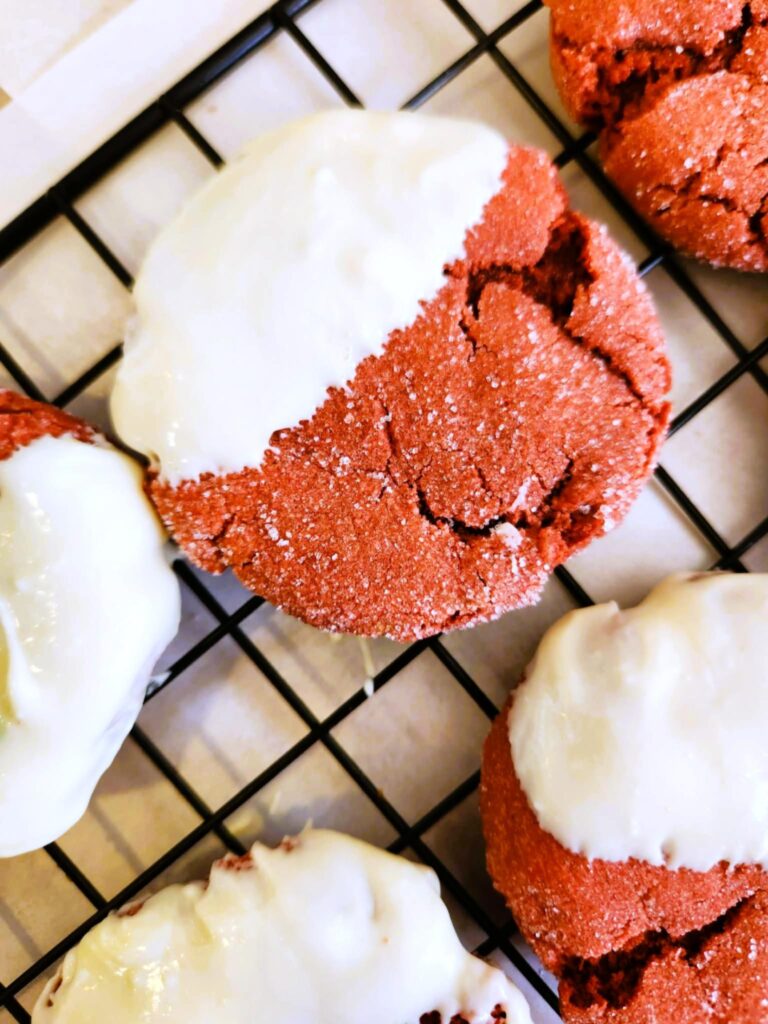
These thick, chewy red cookies are rolled in sugar and half-dipped in white chocolate for a bakery-style red velvet treat. Perfect for Valentine’s Day, Christmas, or any sweet craving!
White Chocolate Dipped Red Velvet Cookies | Thick, Soft & Bakery-Style
Alright. Buckle up. I have a confession.
I am just not a fan of the flavor of red velvet cake. Logically, I should be. It’s basically soft chocolate with a little tang. That should be right up my alley. But every time I try it, I’m underwhelmed. It’s fine. It’s… there. It exists. We move on.
So imagine my surprise when these Red Velvet White Chocolate Dipped Cookies completely changed my mind.
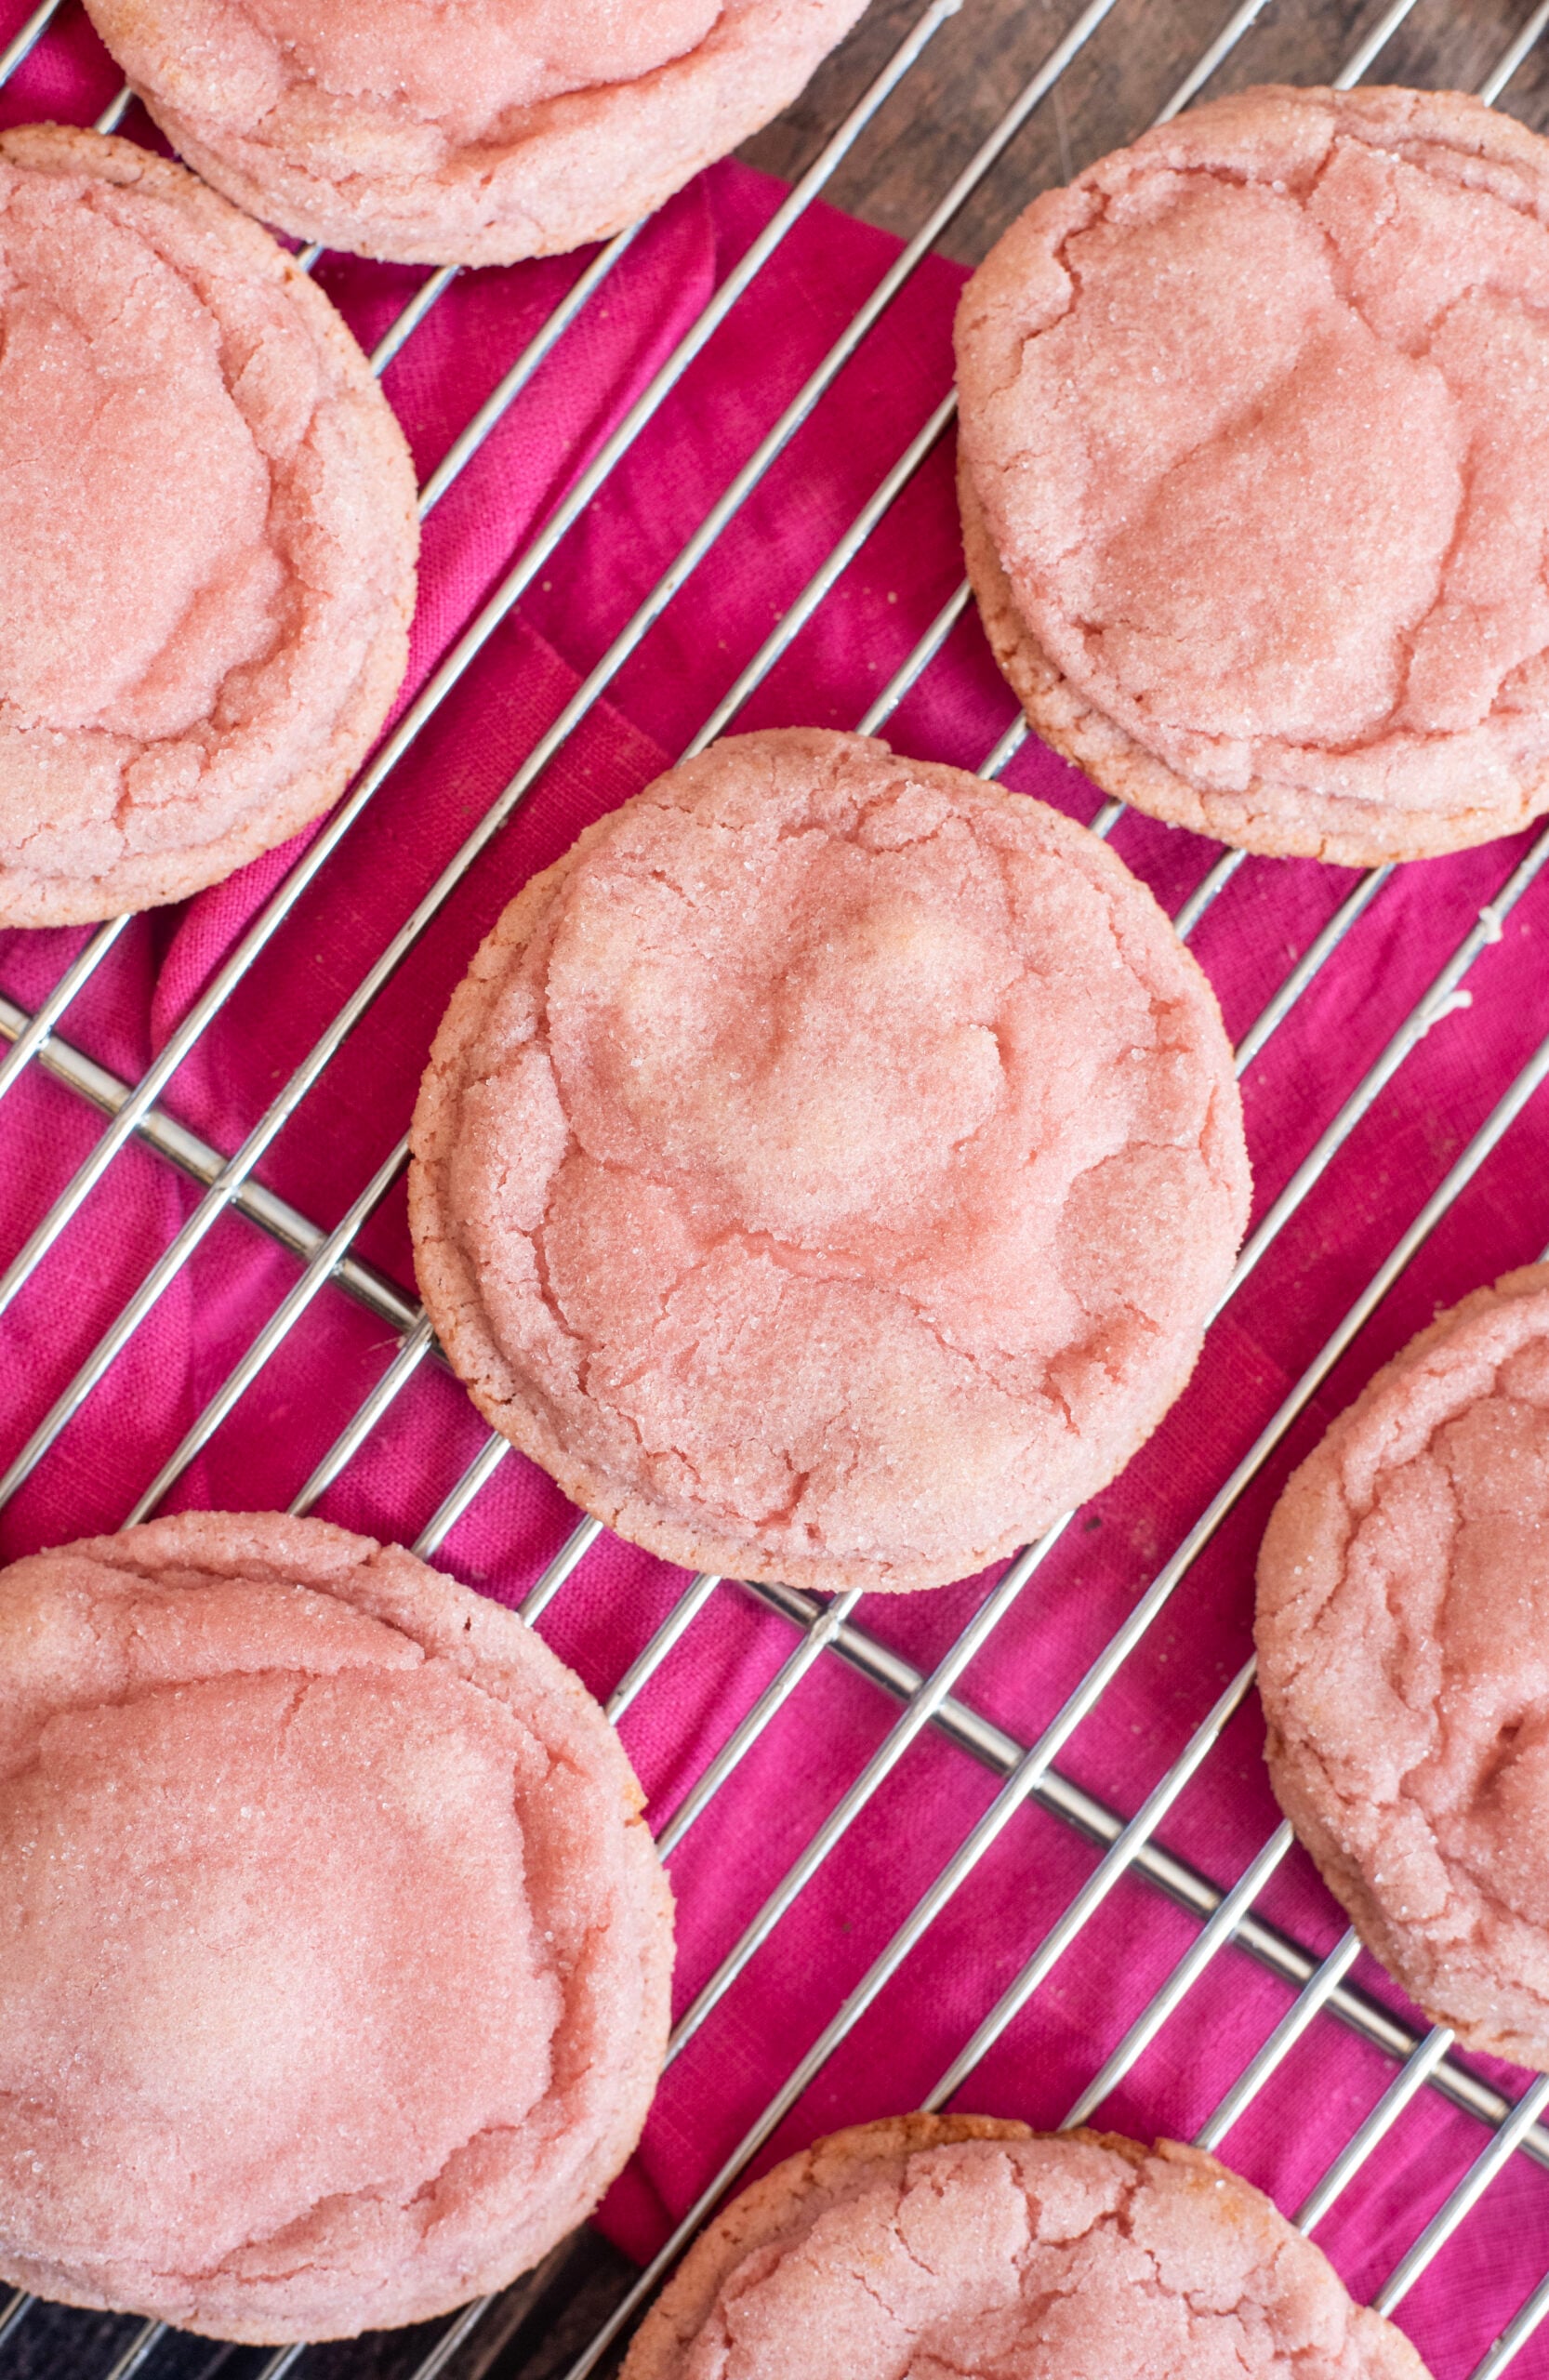
These are not cake pretending to be interesting. These are thick soft red velvet cookies with crackly sugar edges and tender, chewy centers. The cocoa actually shows up. The little splash of vinegar gives that classic red velvet tang. And when you dip half in creamy white chocolate? Now we’re balanced. Now we’re dangerous.
If you’ve been hunting for a soft red velvet cookies recipe that delivers true bakery texture without shortcuts, this is it. A proper homemade red velvet cookie recipe – and yes, these are red velvet cookies without cake mix. Because we don’t cut corners when we can do it better.
They make beautiful Valentine’s Day red velvet cookies, but they’re just as perfect for Christmas trays, cookie swaps, or random Tuesdays when you want something bold and dramatic on a plate.
And if you’re already turning on the oven, go peek at some other WHISK cookie classics .. chewy chocolate chip cookies, classic sugar cookies, bakery-style peanut butter, or brownies that mean business. If we bake, we bake properly.
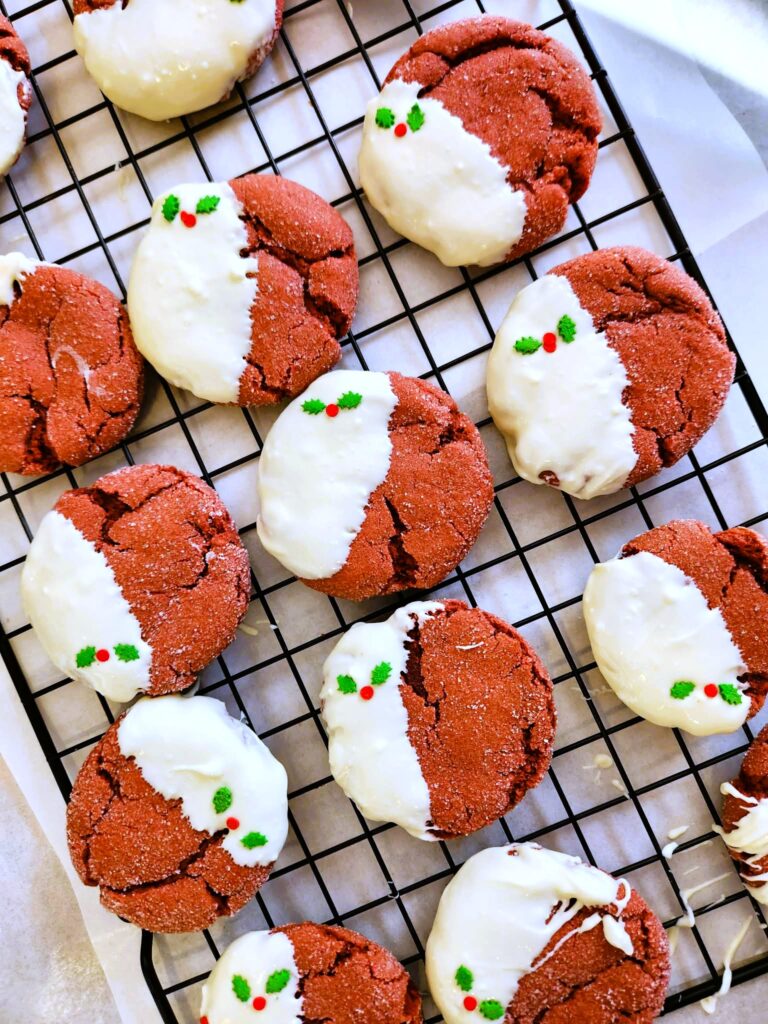
ps.. gah!!! I thought I took more non-holiday decorated shots of the cookies before I bedazzled them all with holly confetti … but I didn’t. Sorry for the cross contamination of holiday vs. regular ol’ Saturday afternoon baking in these pictures!!
Ingredients
For the Cookies
- ½ Cup butter, softened
- ⅔ Cup granulated sugar
- ⅓ Cup brown sugar
- 1 large egg
- 2 Teaspoons vanilla extract
- 1 Teaspoon red food coloring
- ¼ Teaspoon espresso powder (optional but highly recommended)
- 1 Teaspoon white vinegar or buttermilk
- 2 Cups + 2 Tablespoons all-purpose flour
- 1½ Tablespoons cocoa powder
- 1 Teaspoon baking soda
- ½ Teaspoon cornstarch
- ½ Teaspoon salt
For Rolling
- ¼ Cup granulated sugar
For Dipping
- 1 Cup white chocolate chips
How To Make Red Velvet Cookies
- Preheat the oven to 350°F and line two baking sheets with parchment paper. Use two pans: while one batch cools, the next one bakes – true bakery style red velvet cookies efficiency.
- In a large bowl, cream together butter and sugars until light and fluffy.
- Add the egg, vanilla, red food coloring, espresso powder, and vinegar (or buttermilk). Mix until smooth. The espresso powder deepens the cocoa flavor in these chewy red velvet cookies without tasting like coffee.
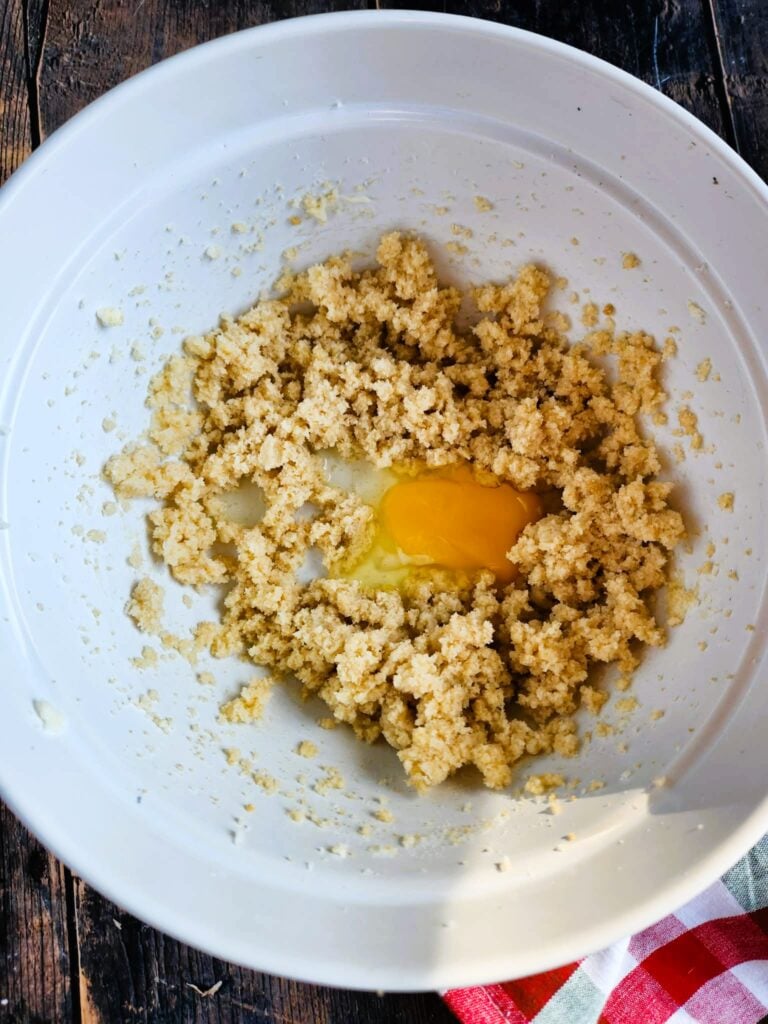
- In a separate bowl, whisk together the flour, and sift the cocoa powder, baking soda, cornstarch, and salt. Sifting the cocoa helps keep these cookies light and prevents any clumps of bitter cocoa in your red cookies. Gradually mix into the wet ingredients just until combined. Do not overmix.

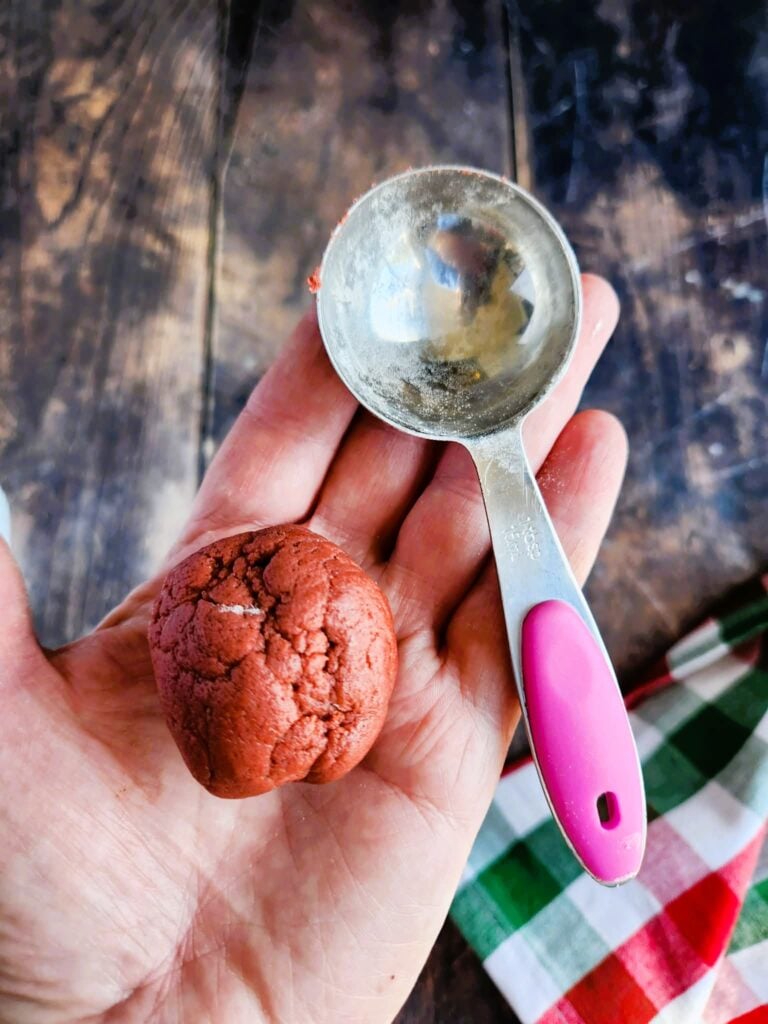
- Scoop dough into large balls – bigger than you think. That’s how you get those thick soft red velvet cookies.
- Roll each dough ball in sugar, then move to your baking sheet.
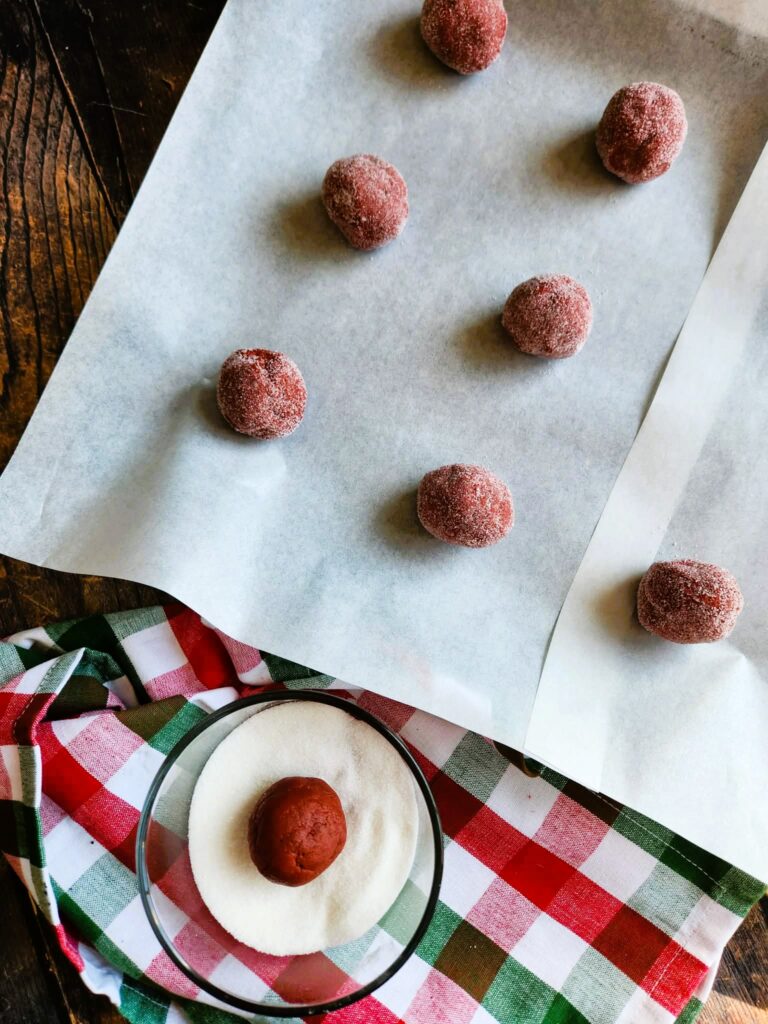
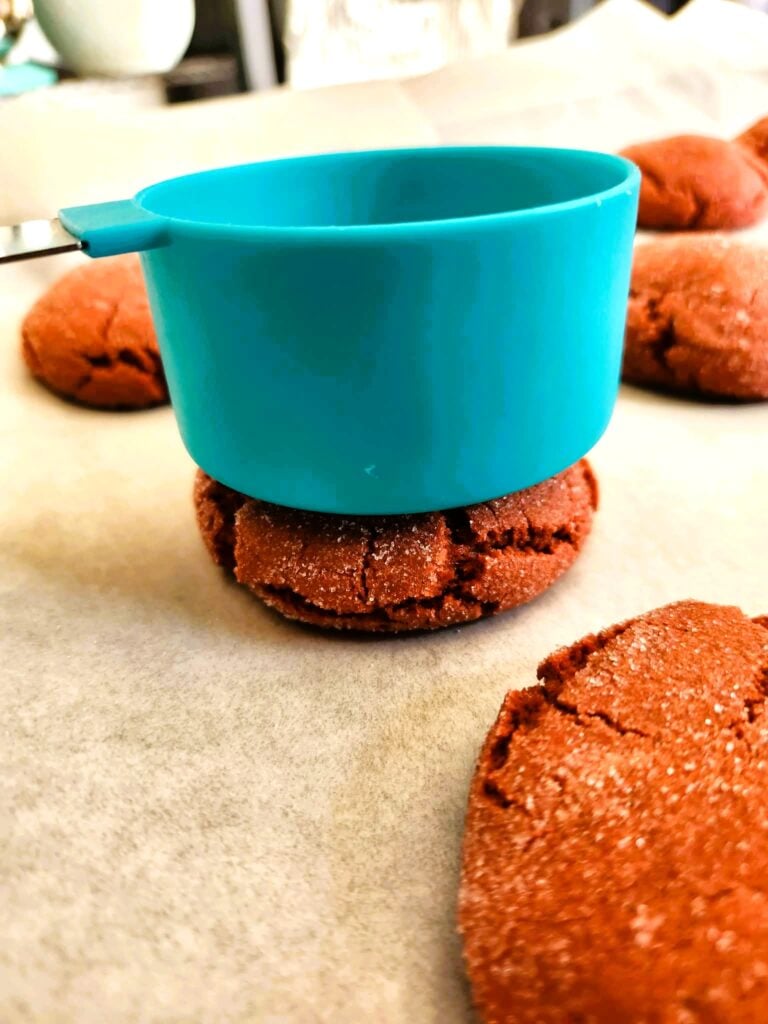
- Bake for 9 minutes. The centers will look slightly underdone – perfect for soft cookies. As soon as they come out of the oven, gently flatten each cookie with the back of a spoon, a measuring cup or your palm for that signature bakery-style thick yet even look. Let cool on the pan for 10 minutes before transferring.
- Melt white chocolate in 20-second intervals, stirring between each round until smooth. Stop heating when almost melted – residual heat will finish it. Glass bowls hold heat and can push chocolate into seizing territory.
- Dip half of each cooled cookie into the melted white chocolate. Let set completely on parchment.
Tips & Tricks (The Stuff Nobody Tells You)
1. Slightly under-cream the butter and sugar. Over-aerated dough spreads too much. Fluffy is good, mousse is not.
2. Let dough rest 10–15 minutes. Not a full chill, just a pause. Hydrates the flour and thickens the dough so cookies stay thick.
3. Scoop and roll. A cookie scoop keeps them even; rolling smooths the outside for perfect crackle.
4. Tap tops if needed. If one puffs too much, gently press with the bottom of a glass while hot. Instant bakery-flat perfection.
5. Dip at an angle. Tilt the cookie slightly and twist when lifting. Chocolate looks professional. Minimal effort.
6. Flaky salt on white chocolate. Just a sprinkle awakens the sweetness and balances flavor.
7. Test cookie first. Bake one, adjust sizing or flattening, then commit to the rest. Professionals test batches.
FAQ
Can I chill the dough overnight?
Yes – flavor deepens. Let sit 20–30 minutes at room temp before scooping.
Why are my cookies spreading too much?
Butter too soft, over-creamed sugar, or hot baking sheet. Cool sheets between batches.
Can I skip food coloring?
Absolutely. Still delicious, just not bright red.
Can I use dark chocolate instead of white?
Yes, but white chocolate gives the classic red velvet balance.
Can I make them into sandwich cookies?
Totally. Use cream cheese frosting between two cookies. Dangerous but delightful.
How do I make them festive for Valentine’s Day?
Heart-shaped sprinkles before baking, or drizzle extra white chocolate after dipping. Done.

Why You’ll Love These
- Thick, bakery-style texture
- Soft, chewy centers with crackly edges
- Classic red velvet flavor without being overpowering
- Creamy white chocolate balance
- Fully homemade .. no cake mix shortcuts
Storage
- Store in an airtight container at room temperature up to 4 days.
- Freeze baked (undipped) cookies up to 2 months. Dip after thawing.
- Dough balls can be frozen and baked straight from frozen; add 1–2 minutes to bake time.
Final Thoughts
I still won’t pick red velvet cake.
But these White Chocolate Dipped Red Velvet Cookies?
They converted me.
They’re bold. The are super chewy. They’re slightly dramatic. And they prove that sometimes the problem isn’t the flavor .. it’s the format.
Double the batch. You’ll thank yourself later.
Holiday Upgrade:
Want to make them extra fancy for Christmas? Add a tiny holly design on the white chocolate .. a couple green icing leaves and three little red sprinkle “berries.” Suddenly these bakery style red velvet cookies go from everyday indulgence to holiday cookie tray royalty. Minimal effort. Maximum applause.
Super lazy genius fancy.
Xoxo,
Heather 💋

White Chocolate Dipped Red Velvet Cookies | Thick, Soft & Bakery-Style
Ingredients
For The Red Cookies
- ½ Cup butter softened
- ⅔ Cup granulated sugar
- ⅓ Cup brown sugar
- 1 large egg
- 2 Teaspoons vanilla extract
- 1 Teaspoon red food coloring
- ¼ Teaspoon espresso powder optional but highly recommended
- 1 Teaspoon white vinegar or buttermilk
- 2 Cups + 2 Tablespoons all-purpose flour
- 1½ Tablespoons cocoa powder
- 1 Teaspoon baking soda
- ½ Teaspoon cornstarch
- ½ Teaspoon salt
For The Rolling
- ¼ Cup granulated sugar
For The Dipping
- 1 Cup white chocolate chips
Instructions
- Preheat the oven to 350°F and line two baking sheets with parchment paper. Use two pans: while one batch cools, the next one bakes – true bakery style red velvet cookies efficiency.
- In a large bowl, cream together butter and sugars until light and fluffy.
- Add the egg, vanilla, red food coloring, espresso powder, and vinegar (or buttermilk). Mix until smooth. The espresso powder deepens the cocoa flavor in these chewy red velvet cookies without tasting like coffee.
- In a separate bowl, whisk together the flour, and sift the cocoa powder, baking soda, cornstarch, and salt. Sifting the cocoa helps keep these cookies light and prevents any clumps of bitter cocoa in your red cookies. Gradually mix into the wet ingredients just until combined. Do not overmix.
- Scoop dough into large balls – bigger than you think. That’s how you get those thick soft red velvet cookies.
- Roll each dough ball in sugar, then move to your baking pan.
- Bake for 9 minutes. The centers will look slightly underdone – perfect for soft cookies. As soon as they come out of the oven, gently flatten each cookie with the back of a spoon or your palm for that signature bakery-style thick yet even look. Let cool on the pan for 10 minutes before transferring.
- Melt white chocolate in 20-second intervals, stirring between each round until smooth. Stop heating when almost melted – residual heat will finish it. Warning: Glass bowls hold heat and can push chocolate into seizing territory. Use a different type of bowl if you can.. if not, it's ok.. just take it slow.
- Dip half of each cooled cookie into the melted white chocolate. Let set completely on parchment or a wire cooling rack.


I still don’t reach for red velvet cake, but these cookies completely won me over .. thick, soft, and dangerously chewy. Half-dipped in white chocolate, they’re the kind of treat that disappears faster than you can say “just one more cookie” .. plus add a little holiday sprinkles and now they are festive AND fancy! lol